Tri-D Chess Set

A replica of a common background prop in the Star Trek series created for my brother as a gift.

A break from my usual design format, this board was created over a month for my brothers Christmas present after he took an interest in the prop seen often throughout multiple series of Star Trek.

images from various 'star trek' series as reference
A collection or reference images used to try and inform the re-design.

The board first appeared as a plot device on the original series in the 1960’s but generated fan interest amongst fans, later appearing mostly as background set decoration. Toy boards were sold but are exceedingly rare today, as a result I undertook the task of researching what documentation I could find and designing aspects of the construction and ergonomics.

CAD drawing to develop dimensions
Using a mixture of research data, anthropometric data and design choices, a layout which was function and aesthetically consistent with the original was designed.
fitting the base during manufacture
Using a mixture of research data, anthropometric data and design choices, a layout which was function and aesthetically consistent with the original was designed.

The frame was originally going to be made of tubular steel, forged in my high school’s workshops into the desired curve. After bending the first tube, this proved too time-consuming and so a wooden frame was jig-sawed. The base was cut to resemble Starfleet insignia imagery.

The boards are laser cut polymethacrylate sheets with ‘white’ squares represented by a rastering effect. The small 2 x 2 boards are mounted on tubular aluminium as they are intended to move. The unit assembles with no screws, slotting into place.

game board acrylic detailing
Board details near the end of assembly.
second presentation shot
The final design laid out on the dining table for Christmas morning.

This was a fun project even if the design was somewhat prescript, I feel it gave an appreciation of craft-based design at a time when I was focusing on engineering methods and hypothetical design.

If I were to do this project again or make more as part of a series I would like to change the way the mini boards attach given that they are not as robust as I would like, relying on adhesives and also, I would have liked to pursue the metal frame beyond the minor forging I was able to do.

Lighting Exploration Project

A year long exploratory project for Advanced Higher Art & Design exploring perceptual relationship with nature through a semiotic analysis in the context of lighting design.

Art and Design, as opposed to the engineering-based Product Design, focuses less on tech-based skillets or problem-solving as it does on theme exploration and expressive content with theoretical frameworks applied. I started with a basic idea to explore the geometry and regular patterns in the natural environment, evolved from the abandoned theme of ‘capturing motion’; exploring movement in form.

lighting tests in the dark room
Images from some initial dark room experiments on form development.

This interest in geometric form in nature morphed into an exploration of what certain patterns and shapes mean to people, observing the boundary between organic form and the more geometric patterns which often underpin them and how this can be used loosely as a method to explore a broader conception of ‘nature’ and the built environment.

Given the long timescale format, I decided that I wanted to introduce a more technical element of my own accord, learning over the course of the year to use Arduino and constructing multiple prototypes and methods of lighting and interfacing with light. This foundational knowledge in code laid the path to my later interest in JavaScript and other technologies.

a triangle-based prototype
A collage of images from the ‘triangles’ development route.

One particular branch of exploration which interested me was this exploration of triangular formations. The triangle or triangular-pyramid provides a repetitive tiling structure but the angles of 30 and 60 degrees added an element of rapidly expansive complexity (akin to polygons in CAD modelling) which opened a great many possibilities in a short amount of time.

In addition to Arduino controlled lighting, polymorph plastic played an integral role in the projects outcomes. Polymorph is a polymer with properties very close to polymethacrylate that can be moulded at around 60 degrees, allowing it to be melted down and moulded over and over again. As it turns out, it also has great optical properties as well.

final presentation board
The final outcomes in various scenarios showing the Arduino controller and capacitive touch panel.

The final design was a range of units, designed to be placed apart as part of a set, which function as sculptural pieces as well as mood lighting and manipulation. The units are lined with RGB LED’s to diffuse light across their bodies, hooked up to an Arduino controller and optional control panel.
Several programs were written for different effects. Capacitive touch and proximity detection was used whereby the Arduino could detect electro-magnetic interference near a circuit and respond. Once program had the panel respond to toggle colours on and off on touch. Another detected user’s proximity to an individual unit and lit the rest up like a ‘heat map’, in response to the relative position.
The idea was that, with more psychological user research, the units could read the users mood and respond with an appropriate stimulus colour.

Victorophone

Every year the innovation platform Jovoto hosts a challenge to design a limited edition swiss army knife casing design for Victorinox.

The competition is one of the most well-known repeating challenges on the site with little to no restrictions place on the aesthetic theme or outcome. In recent years a general theme has been defined but for the 2015 competition it was left open.
The Victorinox Logo.

I decided this was a good chance to branch into an area of product design which was new for me at the time. The challenge is purely graphical, you cannot change the function or materials of the knife and the logo must remain in the same location.

painting the second design manually
The original design for ‘A tool for all people’ before scanning and editing.

Two of the designs were created using manual techniques which were then scanned and adjusted for use in the final design, the third was created entirely digitally.

two ideas promotional posters
One of the promotional images for each of the three ideas.

The first of my designs played on the idea of smart devices (amongst other products) being compared to the Swiss army knife to describe them as versatile and useful, eg “This phone can do anything, it’s the Swiss army knife of modern phones” by representing each of the functions of the knife as an ‘app’ icon on a phone graphic.

The next (top left) looks at trying to capture motion and energy through use of blown inks and fast, un-coordinated brush strokes.

The last design is similar in that it uses a bright spectrum of colours to convey dynamism. The design uses they symbolism of a rainbow or spectrum to represent diversity of people. This is to push the idea of social acceptance and accessibility as the colours connect the design to the LGBTQ flag but do not make a direct connection.

In hindsight, it may have been prudent to make the LGBTQ connection stronger to cement the message but I wanted to keep interpretations for the design as open as possible.

Child’s AI Companion

A project looking to create an educational toy for nursery children aged 2.5 to 4 years, culminating in a robotic dog designed to provide companionship and empathy building skills.

The dog, designed to resemble the function of a pet to an age group unsuited to live animals, is tied into the IBM Watson API to respond intelligently to the child’s actions, mimicking a real pet. Within my high school, this project was the first and only SQA Higher Product design assignment to reach 100% in grading.

initial ideas sketches
The six initial ideas, some focusing on empathy building, some on cognitive development and some on physical development.

The target age group possess a challenge given they are so young, this outcome aimed to stimulate social and empathetic skills, getting them to play and connect with something that, to their eyes, is a real animal but without the risk or spontaneity of having live pets in the vicinity.

a model of the dog made from polymorph plastic
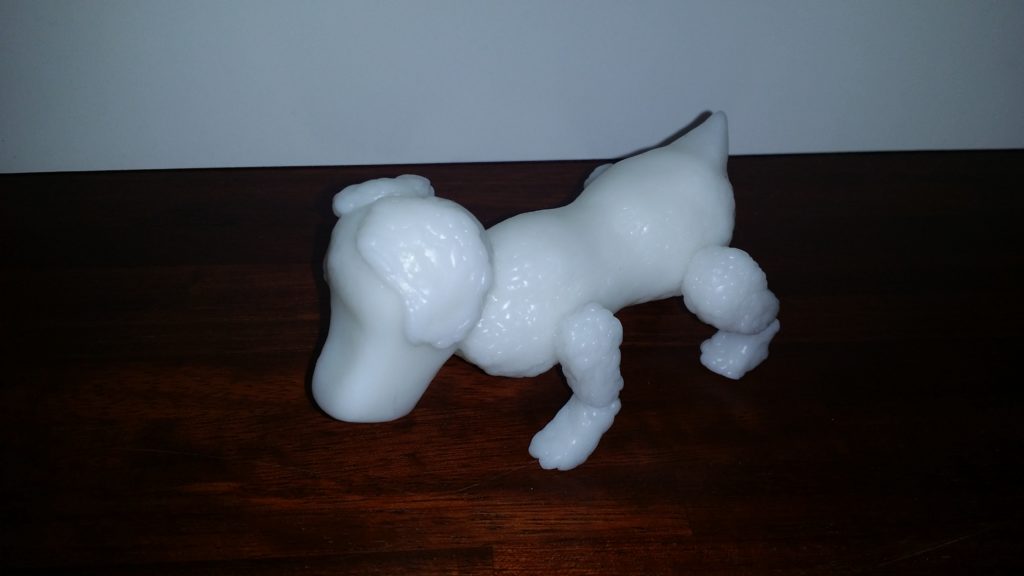
An early sketch model to judge the proportions of the dog. After this it was decided to make more elements geometric for fear of negatively blurring the distinction between the tech dog and real animals in the child’s mind.

The Dog would function full time in the context of a nursery school or play centre, randomising its behaviour (in a controlled scope) and reacting to environmental stimulus. Through the Watson API, it is sensitive to the behaviours of young children, reacting to their needs, for instance, backing off and acting docile if they express fear, coming to comfort if they look sad, excited during play.

technical details page
Some internal technical development to boost durability and implement safety features.

Control interfacing would be done through a custom computer software to customise behaviours, activate games, map the play area and ignore certain people should a particular child take exception to it.

The dog is short, geometric and robust, moving on protected wheels at the base of the legs, the dog can take a considerable amount of abuse whilst being possible to undergo repairs.

a sketch of the screen construction
In hind sight, more research and development could have been spent on the ‘analogue’ functions of the dog rather than tangents such as this screen for playing games.

This project definitely veered into territory that at the time I was unfamiliar with, that being an area of psychology / therapeutic design and speculative territories about our future relation with technology.

If I were to do this project today, I would like to not get as hung up as I was on the physical aspects of the design, for example, the touch screen game interface that was unnecessary and far beyond the comprehension of the target age group. More attention could have been payed to the beneficial (or otherwise) ways we interact with animals and what core empathy skills a child of that age could benefit from boosting.

Torch CAD Specification & Graphics Package

Higher Graphic Communication ‘Thematic folio’ produced to sharpen my technical competency and visual presentation capability in final year high school.

The Thematic Portfolio is essentially what other institutions would call a technical package, a fully detailed CAD package with supporting parts list and promotional material.

We were asked to choose a physical product to reverse-engineer, build in CAD, and then create a brand identity around. I was excited to use this as an opportunity to expand my Autodesk Inventor skills and build a strong brand image around the product.

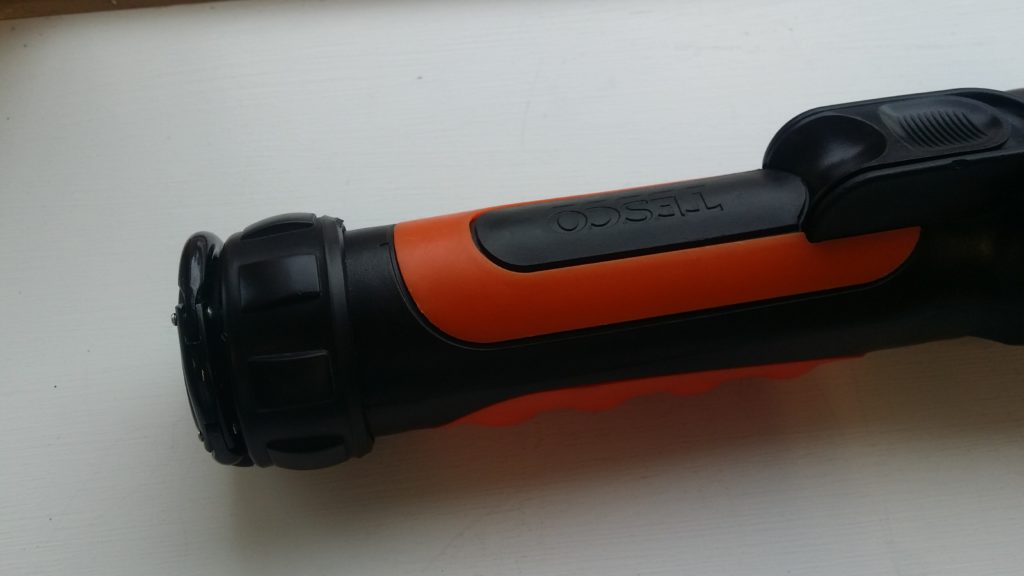
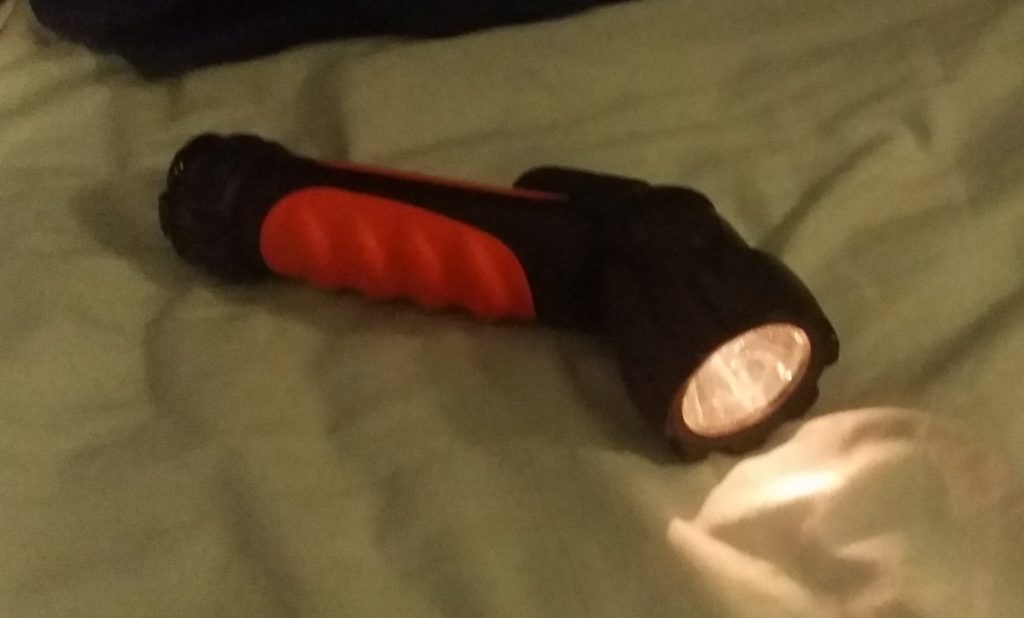
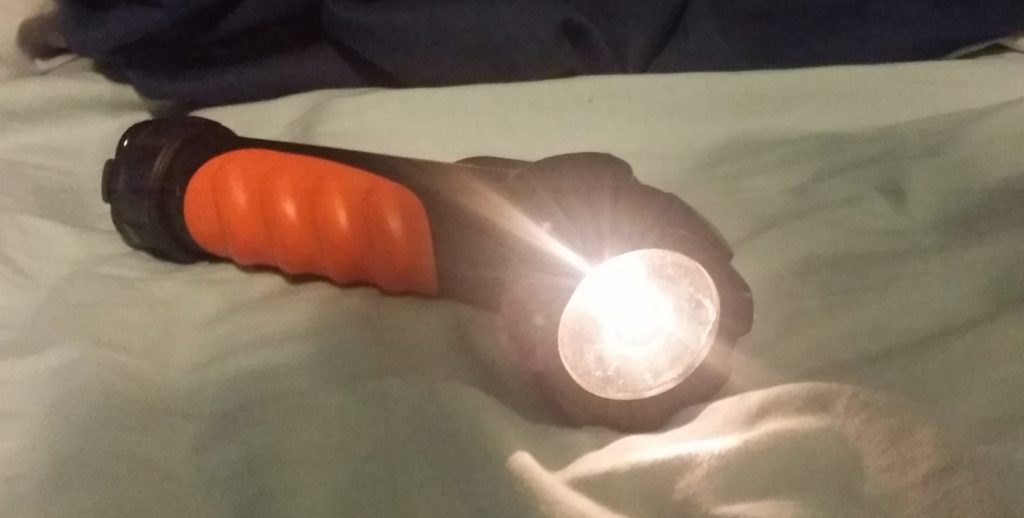
I choose this Tesco torch with a rotating head that can be tilted 90 degrees. Given it’s rotating mechanism, features following or arrayed around the cylindrical body, and detailed components, I felt it was a good challenge for my skill sets at the time. If I had wanted to I could have omitted detail such as the orange detailing, the clip, or the bulb assembly and still met the requirements of the brief but insisted on including these details for the sake of it.

The thematic is, in essence, a full visual display portfolio for our chosen product where we act as though the product is of our own design and we must now visualise and communicate it to a client, manufacturer and customer.

This folio is comprised of three components:

  1. A fully annotated technical package including parts sheets.
  2. Rendered CAD assemblies and exploded views.
  3. Promotional posters and leaflet.
torch CAD model
A render of the assembled torch.
torch CAD model exploded parts
An exploded view of the torch
specification sheet for model parts
Fully dimension-ed part sheet
promotional leaflet
The leaflet showing faux-company details
promotional posters
One of the posters produced.

The fictionalised ‘Nitor’ was presented as a utility device for both home use and the outdoors (in reality the torch was far too fragile to do either). The graphic presentation was based around plays on the idea of folding and direction changes.

This was a chance for me to play with some new graphic techniques including layered transparency and a form of flat design used for the icons. The text affect attempted to evoke the imagery of an eclipse.

NAT5 Course Material

In my fifth year of high school I contributed to a course redesign by supplying an exemplar project.

In my senior year, the ‘Intermediate’ courses were being replaced with the new National 4 / 5 courses (equivalent to GCSE’s). In this roll out, new materials and methodologies had to be designed. For Product design (now Design and Manufacture) this involved a research – oriented project for which I was asked to create an archetype to be used for demonstration purposes.

The brief was an introduction to research to inspire an interest in developing fields and technologies as well as an interest in research as a functional and recreational activity.

This is something I very much agree with and so was excited to participate in the creation of this new project.

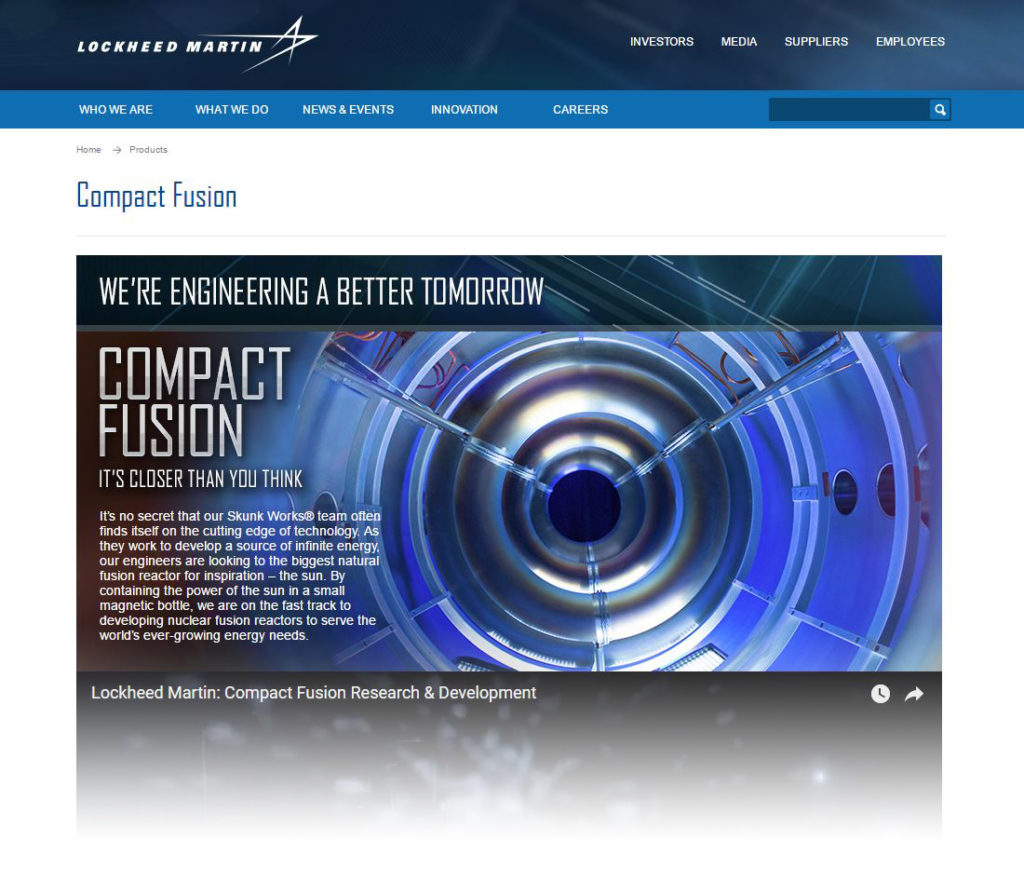
screenshot of Lockheed Martin's site in 2014
The landing page for Lockheed Martin’s fusion project.

At the time, Lockheed Martin was making headlines with their ambitious claim that they were five years away from achieving a sustainable fusion reactor. This was exactly the sort of thing the brief was indenting to look at.

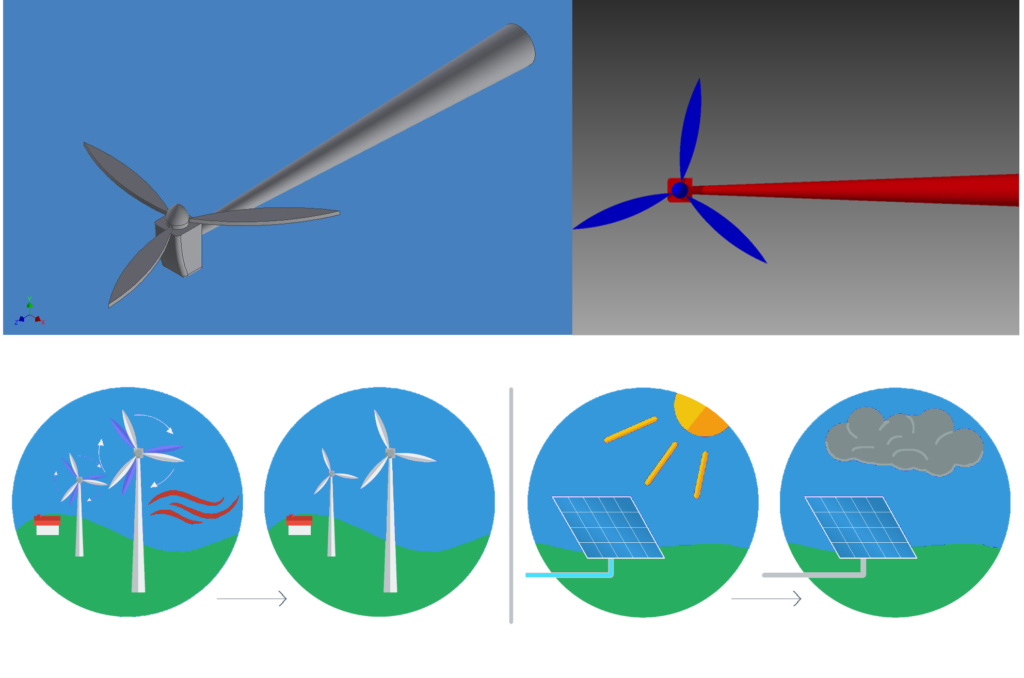
icon development
At the time I was unfamiliar with vector-based programs, I created logos by designing shapes in Inventor and drawing over them with the colour select tool in Photoshop.

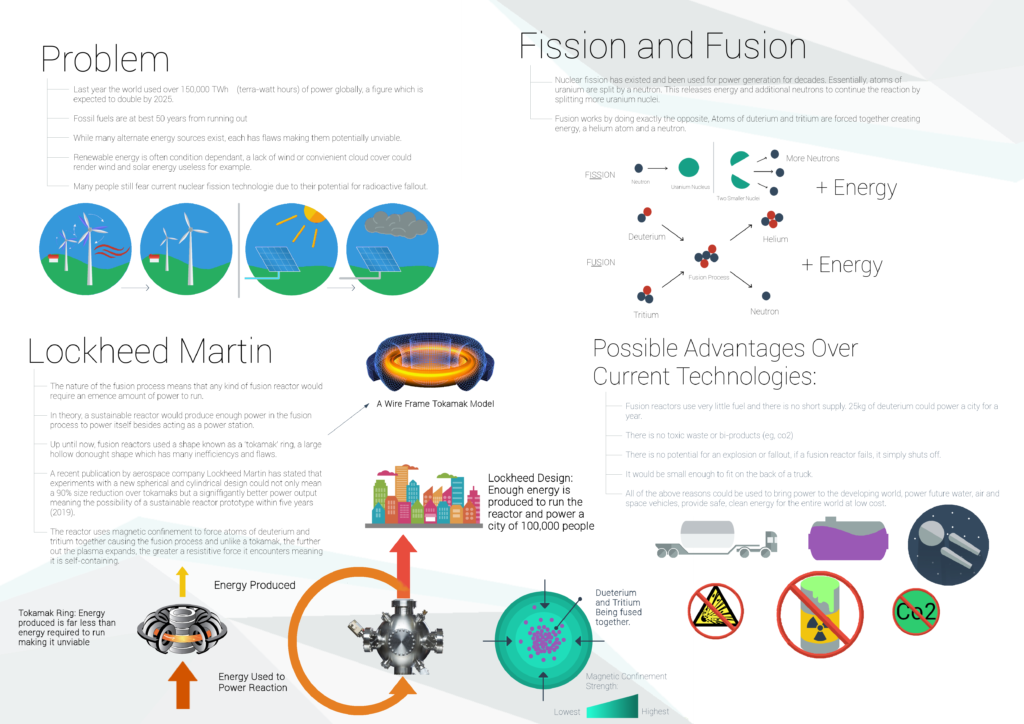
To visualise the research I utilised newly – learned ideas about graphic design, flat design and visual presentations.

final poster
Final Poster Design

Utilising some previously devised archetypes and new techniques,this was the final design which was well accepted by the technical team for use in the project.

CCV Interface

A very early project to engineer a desk table with built in computer interface extension.

This project, developed over the summer of 2013, was one of the first ever long-form, self-directed projects I undertook. A small, movable work table with a reflected PC display extension and touch capability. It was built on the open source software Community Core Vision (CCV).

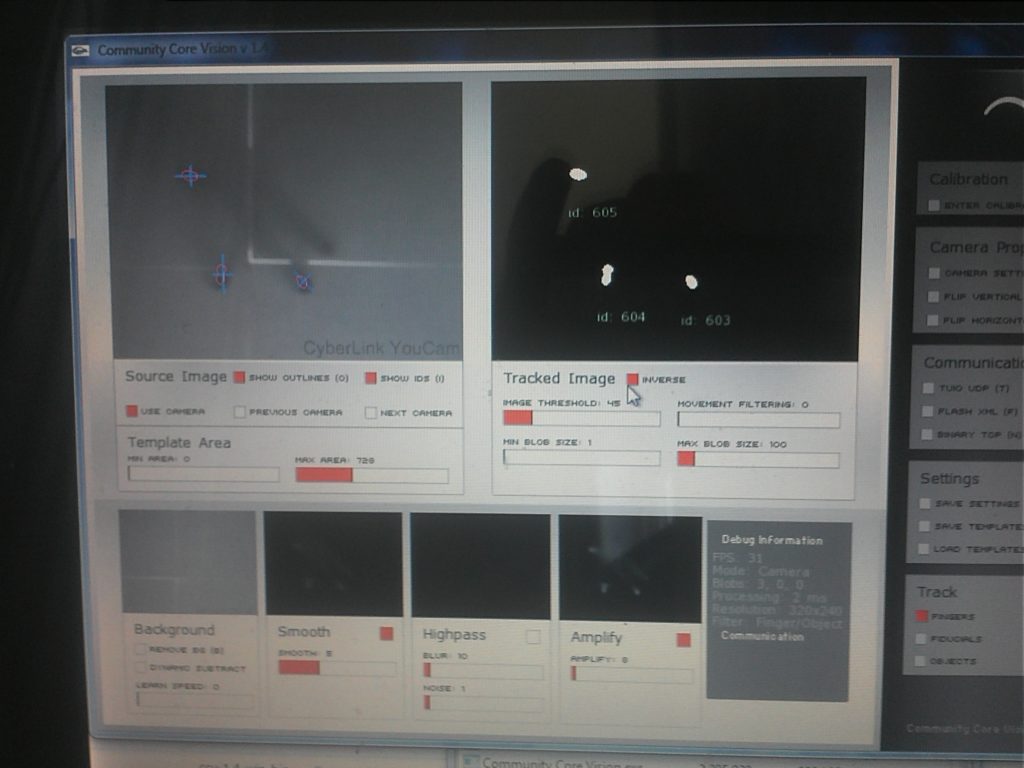
community core vision software
The main interface for CCV, on the left is the raw infrared image, the right shows the filtered image and registered touch points.

CCV is an open source software designed to interpolate data from an infra-red camera for use in this kind of project. The above image shows data from an experiment before the LED arrays were even introduced (i.e. working only with ambient IR light), already the software can detect ‘clicks’.

a disassembled and modified webcam
The final camera assembly after modification.

The device works by flooding the display sheet of polymethacrylate with strips of infra-red light via IR LED arrays. A small standard webcam is housed inside, modified to block visible light and pick up IR radiation. The IR light is even throughout the sheet until something comes into contact with the surface, at which point light deflects into the camera. The camera is in continuous use by the CCV software.

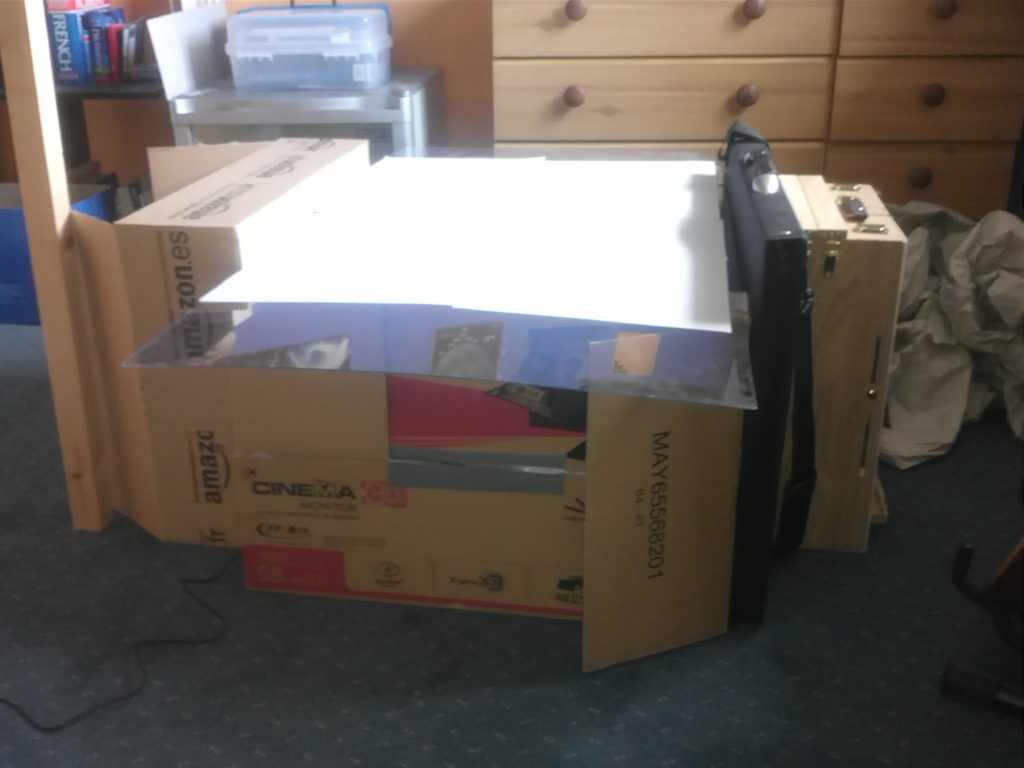
testing a prototype for the ccv table
Throughout development and testing, several mock-ups were setup to simulate different conditions such as the amount of outside light pollution and camera / projector distance tolerances.

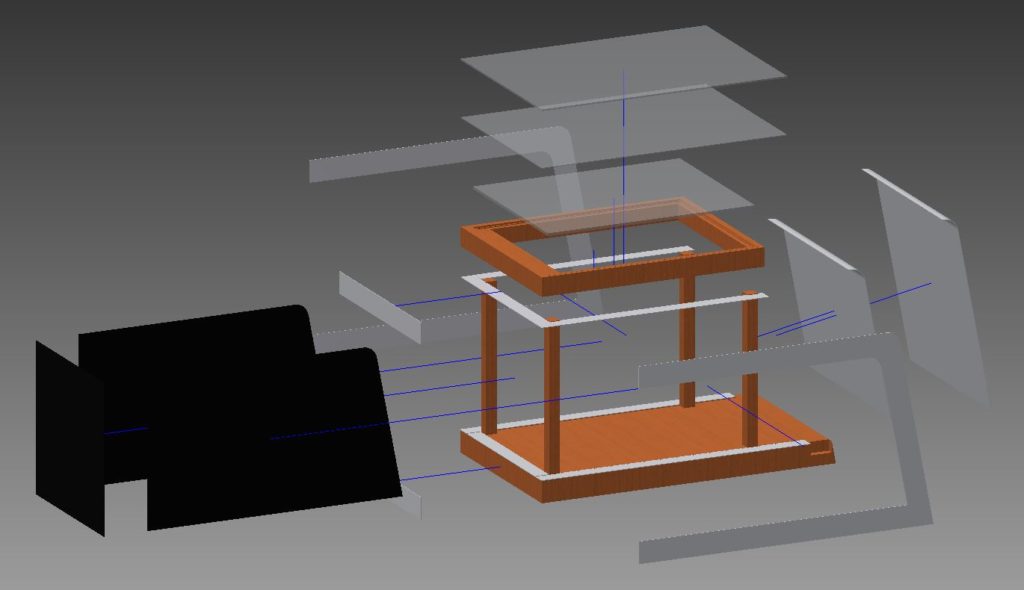
To design the casing, I created a minimalist but aesthetic form, inspired by the set design of one of the Star Trek movies. The display is created by linear setup of a projector reflecting off a mirror. The table has to encase the projector reflection assembly and camera with minimal light bleeding in so avoiding a ‘blocky’ aesthetic was a challenge.

an exploded view of the components
The exploded CAD model, designed as a reference for the real-world build.

A full assembly was designed with a wooden frame clad in sections of polymethacrylate to give a smooth aesthetic in line with trends at the time. The table was designed with home / workshop manufacture in mind; I did intend to make it only opting not to due to cost and storage constraints.

In reflection I realised that I had, for the longest time, brushed away this project because of a restrictive mindset I was in at the time; this has no particularly beautiful renders or SQA-style presentation sheets. However, on closer analysis, I am very satisfied with how this project came out; the design was ready for manufacture, the projector camera assembly was working, acting as a proof of concept, and much was learned about electronics, interface software and engineering techniques which would serve useful later on.

Station Lighting

One of my oldest projects, done in early high school; A UX and Lighting project for use in redeveloping rail stations.

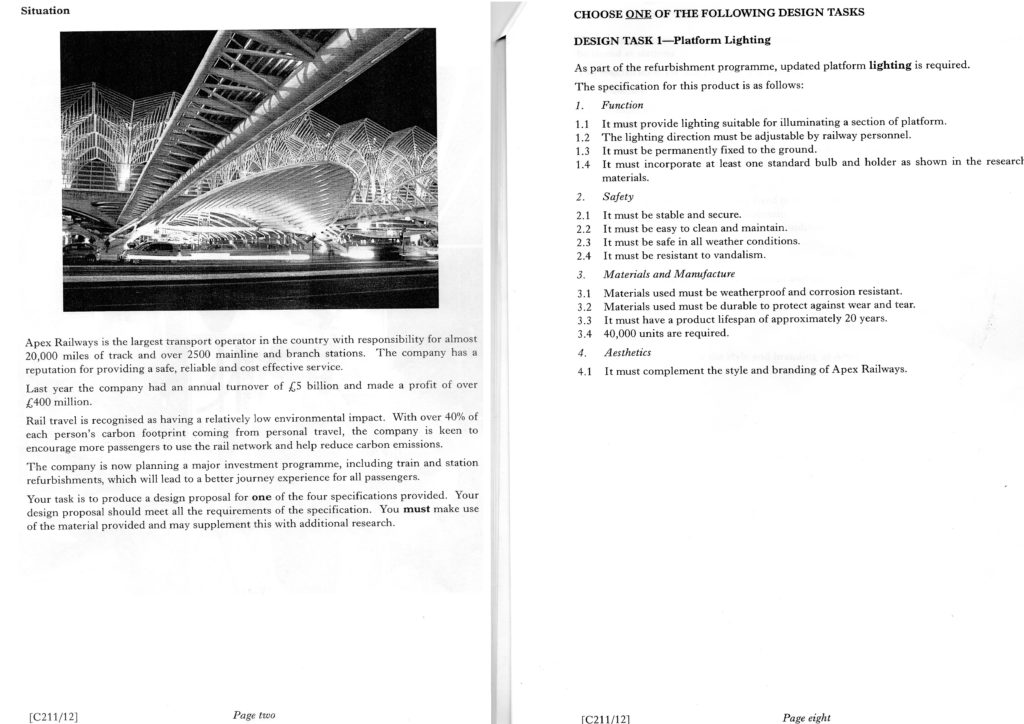
As part of the Higher Product Design Course, as with Intermediate Two, we must produce a Design Proposal as a prelude to the Design Assignment which comprised 50% of our final grade. The brief chosen was to create a platform lighting system for a fictional lucrative rail operator to use on all its station platforms with few restrictions placed on functionality and cost.

scan of project brief
The main brief with the chosen project.

This project was our first real chance to experiment an innovate as the product typology, its placement (multiple units on a platform) and restrictions placed by the brief were all very open.

Four of my original ideas were built on the premise that a lighting dimension could be built into an alternative function, that the functional part of a light is the light emitted and that the product to emit the light was merely a ‘casing’, a means to an end.

In this way, a lighting project can be thought of as a project to design a new way to achieve the generation and projection of light.

sketch of early idea for screen integration
The initial sketch for design idea two, floor directed lighting with a timetable display.

My first chosen idea was built around the idea that timetables could be placed on the ground level and used to project light along the ground. This was built on the idea that ground-level light projection was less intrusive and more ambient than excessive overhead lighting and that to build this into the platform would create a floor level intrusion. If the unit had a secondary purpose, the obstruction could be justified.

sketch of old concept
Design idea five, expanding sculptural light.

My second idea was built on the idea that a piece of lighting could be ornamental as well as functional, as most platform lighting is purely functional. The opens to emit light, transforming into a solid sphere during the day to evoke a sense of mystery and intrigue by being a piece of sculpture as much an emitter of light.

manual render sketch
The final manual render.

The final design chosen was the media display unit which incorporated elements from other ideas such as the rotating light cover from idea six.

The final design refined the notion of projecting light along the floor by emitting light directed down from the floor to about chest height allowing for some ambient spread.

Looking back on the project I am still pleased with the outcome but have some reservations about the means by which the outcome was created.

The brief’s looseness on function, cost and location allowed for some inventive ideas but none of those ideas really solved a problem. I tried to make ideas which enhanced the user experience but the lack of research to form the foundations was, in hindsight, a hindrance.

If I were to take on this brief now, I would want to do a great deal more research, finding a comparable rail operator and defining a set of problems, areas for improvement and constraints to follow.

Zeiss Zugriff

The Zugriff (German word for bridge) is a conceptual product imagining if the opto-electronics Goliath Carl Zeiss AG moved into the field of portable audio.

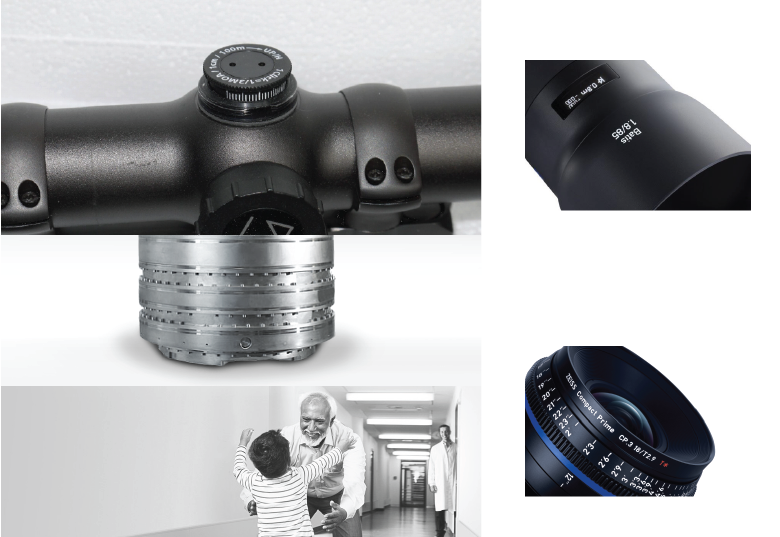
a collage of ziess products
A moodboard of various Zeiss products / promotional imagery.

Carl Zeiss AG has been a sector leader for over 100 years, manufacturing lenses, optical products and specialising in the manufacture of micro-electronics (by way of their optics). A large and sterile brand, their ‘image’ is quite hard to place, certainly they wish to put forward an image of loyalty, stability and enabling but how much of that actually shines through their work?

early hinge development sketches
Zeiss leads absolutely in the sectors in which they operate, they set the standards and often have a unique presence despite attempts at copying. It was important that this speaker embody that distinction.

I decided that in the highly unlikely case that Zeiss broke form their optics-only model, such a speaker would want to embody the values of versatility, perhaps linking to their large sports-optics range. It should embody a ‘quirky’ high technology functionality and should embody the stability, balance and engineering associated with other Zeiss products.

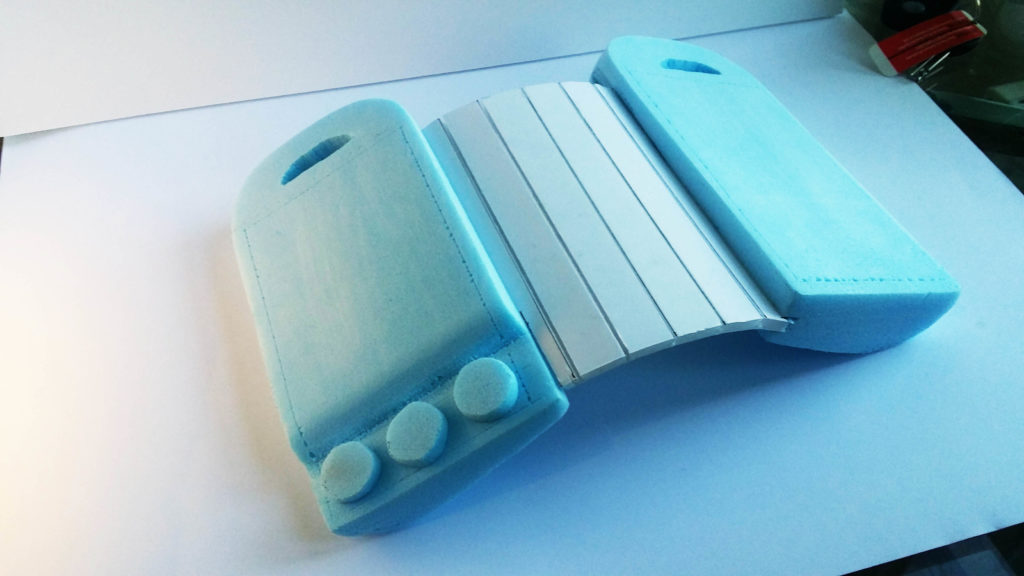
blue foam scale model
The final block model put across the physical feel of the device despite not having a ‘proper’ hinge.

The final designed carried through a mirrored 360 hinge mechanism to allow differing modes of sound output (direction vs ambient). The unit is highly durable, made of an experimental fibre mesh aluminium and designed to compliment Zeiss’s sports optics range.

features of the product annotated
An annotated render from my presentation showing key points of functionality.
conceptual renders of the model showing different use cases
A final render series showing the device in a range of intended locations.

In reflection I found this project very challenging, after all Zeiss isn’t what I’d call a flexible brand. I enjoyed the chance to broaden my scope on branding and to consider the semiotic meanings and associations embodied by brands beyond simple aesthetic surface-level messaging.

Margate

The Margate Art tour is a conceptual piece of service design to link cultural hubs along the Kent coast.

Intended to strengthen the growing artistic trend, it is hoped to provide economic opportunity and regeneration.

The Margate Experience Project was a broad speculative piece, focusing on the design process as applied to a real world context.

Unit four of the course is the last unit in stage one and focuses on applying the design process to a real world context by asking us to consider the situation of Margate and how it, through design, could be improved.

The brief for this project was much more open than anything considered previously and offered a great scope for creativity, experimentation and consideration of wider socio-political factors.

margate image from beech
A symbol for modern Margate; the closed Dreamland centre overshadowed by an unmaterialised modernist vision, surrounded by scaffolding.

I was very excited for this project, not only was it the first structured project of my return to the course but it was a chance to act on the idea of using design to effect positive change in a real-life context, to break away from the established idea of physical, consumer-based product design.

In addition, I personally had a bit of a head start in that I had visited Margate before and given some amount of thought to the basic premise of this project.

margate in-person research
Day one of our group trip to Margate conducting research. Even Arlington can look good with strategic lens flares.

Research formed the backbone of this project to arguably a larger degree than some other past projects. This involved interviews, primary and secondary research, the creation of a ‘cultural map’ in groups, a three-day site visit and personal observations and anecdotes.

final presentation board
First Final Presentation Board
second final presentation board
Second Final Presentation Board

My design solution was a conceptual ferry service operating an ‘Art Tour’ around Margate, connecting visitors to key areas of cultural and artistic significance around the east coast.

The core of this idea is to place Margate at the centre of a broader artistic context and culture.

Margate has a rising art scene as personified by the greatly successful Turner Contemporary gallery but is somewhat stunted by its remote location and lack of other attractions. By offering figurative and literal links to other such locations, a coherent experience can be created centred around Margate with connections to London and Dover to entice tourists.

Reflecting back on the project I would have liked to delve deeper into specific aspects of the design like what the onboard commentary would have consisted of, more detail put into the design of the vessels and in general, added more user touch points to make the idea more unique.

In addition I think the project could have benefited from more primary research mid-way through but overall it was a greatly interesting brief to tackle.